Developing a SharePoint Feature
I have worked with SharePoint for a while now, mostly mostly writing code for integration scenarios, where data needs to be “pulled” or “pushed” into SharePoint involving other enterprise software applications. SharePoint 2007 Features are basically a mechanism to extend SharePoint in any way you need. Mike Ammerlaan wrote a brief and concise technical article describing features:
I will try to describe how to develop a SharePoint 2007 Feature from zero. In this case our feature will handle the event that SharePoint usually handles when a file gets added to a Document Library. When a user uploads a new document to a Document Library, we want to run some custom code. In our example we will simply be creating a text file on the desktop containing data from the file that fired such event. Obviously you would want to make it something meaningful, like pass that data to an external workflow application or do womething with that document, but this is just an example.
I have worked with SharePoint for a while now, mostly mostly writing code for integration scenarios, where data needs to be “pulled” or “pushed” into SharePoint involving other enterprise software applications.
1. Setting up our project
Launch Visual Studio 2005 and create a new Class Library project.
File > New Project > Class Library
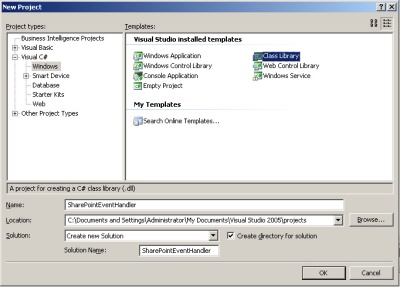
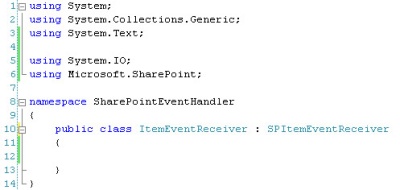
Name it SharePointEventHandler and let Visual Studio create the project files for you in the Solution Explorer.:
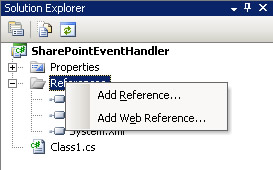
Add a reference to the SharePoint Services API assembly. Right-click in your solutions explorer on the reference folder and select Add reference
The list of available .NET assemblies shows up
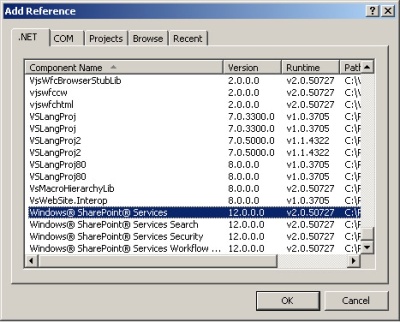
Scroll almost all the way to the bottom and select Windows SharePoint (r) Services, Version 12.0.0.0
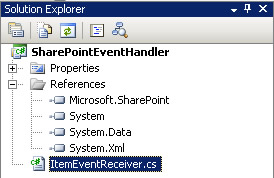
Go back to the Solution Explorer and rename you class1.cs file to ItemEventreceiver.cs
2. Writing our class with our custom code
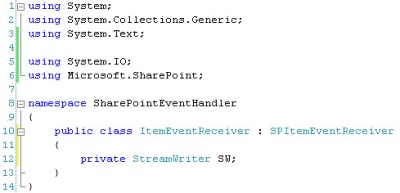
We will be using the WSS API and we will be writing a text file, so we need to write these two directives
using System.IO;
using Microsoft.SharePoint;
Rename your class name to ItemEventReceiver and inherit from SPItemEventReceiveras shown below:
Declare a StreamWriter object:
Now we will write the method we want to override so we can run our own custom code. In this case, the event we want to trap is the ItemAdded event (after someone adds an item).
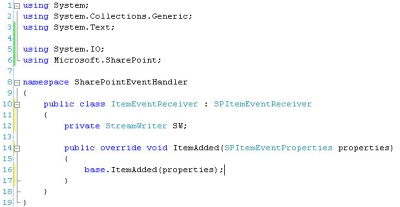
The ItemAdded method is the one that will be called and the properties parameter contains detailed information about the file that fired this event.
Our intent is that a text file is written to our desktop and we will write to it with data coming from the Properties parameter.
Finish your class as shown below.
itemeventreceiver.cs
using System;
using System.Collections.Generic;
using System.Text;
using System.IO;
using Microsoft.SharePoint;
namespace SharePointEventHandler
{
  public class ItemEventReceiver : SPItemEventReceiver
  {

    private StreamWriter SW;

    public override void ItemAdded(SPItemEventProperties properties)
    {
      base.ItemAdded(properties);

      try
      {
        //Set this path below to suit your needs...
        SW=File.CreateText(@"[...]\Desktop\eventoutput.txt");
        SW.WriteLine("CurrentUserId: " + properties.CurrentUserId.ToString());
        SW.WriteLine("BeforeUrl:" + properties.BeforeUrl.ToString());
        SW.WriteLine("SiteId: " + properties.SiteId.ToString());
        SW.WriteLine("ListId: " + properties.ListId.ToString());
        SW.WriteLine("ListItem:" + properties.ListItem.ToString());
        SW.WriteLine("ListTitle: " + properties.ListTitle.ToString());
        SW.WriteLine("ReceiverData: " + properties.ReceiverData.ToString());
        SW.WriteLine("WebUrl:" + properties.ToString());
        SW.Close();
      }

      catch (Exception ex)
      {
        properties.Cancel = true;
        properties.ErrorMessage = ex.Message;
        throw ex;
      }

      finally
      {
        this.SW.Dispose();
      }
    }
  }
}
* Note that the catch block contains two lines that will have no effect, because this would happen after the file was added, so we cannot cancel it anymore nor display an error message. These two lines would be used if we were trapping the ItemAdding event, which fires (asynchroneously) before the item is added.
3. Signing and Installing our assembly into the GAC
The main piece of our feature is our class and once compiled, it needs to be installed in the GAC. In order for it to be able to be installed in the GAC, it also needs to be strong named. Several steps to take, but in VS2005 it is actually hardly any effort at all.
In your Solutions Epxlorer, double click on Properties (My Project in VB) and then selectSigning. From the combobox, select New.

This will launch a dialog as shown below
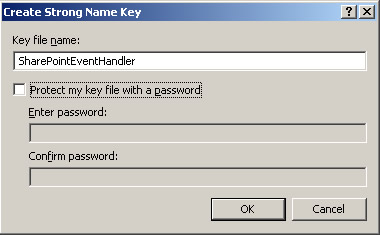
Type in SharePointEventHandler for your Key File name and uncheck the protection feature. Click OK.
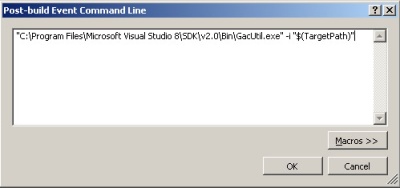
This automatically signs our assembly when we compile. What we still need to do is register our assembly into the GAC and we do that with Post-build events. In the same page, on the left hand, look for Build Events (In VB it is under Build and then there is a button called events)
In the text area type (exactly as you see it):
Post-build command
"C:\[...]\Microsoft Visual Studio 8\SDK\v2.0\Bin\GacUtil.exe" -i "$(TargetPath)"
Click on OK and then build your solution. In your Output window you should see the progress of the build and if correct, you should see a line that says: “Assembly successfully added to the GAC”.
Now, browse to C:\Windows\Assembly and look for a dll called SharePointEventHandler. Once found, right-click on it and check its properties.
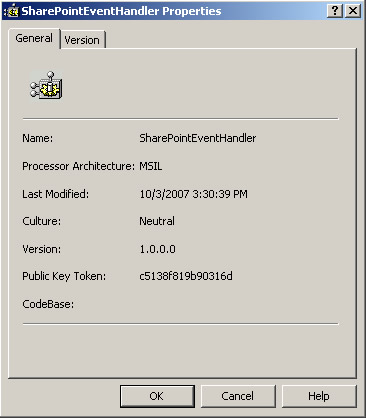
Remember or copy the Public Key Token to a text file, because we will need this later.
4. Define our resource files
SharePoint Features require not just a compiled dll, but also a set of corresponding files. These files are stored in the “12” HIVE on the SharePoint server. The file structure already exists and we will simply be adding files that are used by our feature to it.
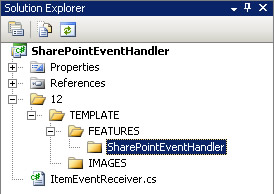
Create a folder structure as shown below in your Solutions Explorer:
In this SharePointEventHandler folder create the following two blank xml files:
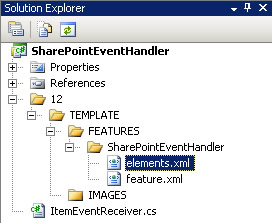
Open the feature.xml file and replace any code with the following:
feauture.xml
<Feature
   Id=""
   Title="SharePoint EventHandler Feature"
   Description="This feature will blah blah blah [..]."
   Scope="Web"
   Hidden="FALSE"
   AlwaysForceInstall="TRUE"
   ImageUrl="components.gif" xmlns="http://schemas.microsoft.com/sharepoint/">
   <ElementManifests>
      <ElementManifest Location="elements.xml" />
   </ElementManifests>
</Feature>
In VS2005, click on Tools > Create GUID
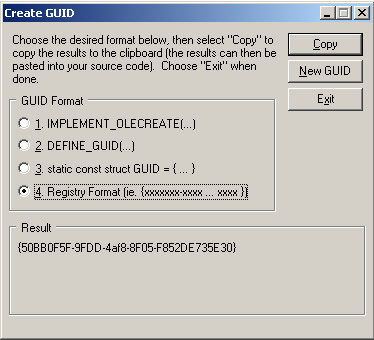
Click on Copy to copy the string and place it in the Id attribute value in your feature.xml file, leaving out the curly brackets!
feauture.xml
<Feature
   Id="50BB0F5F-9FDD-4af8-8F05-F852DE735E30"
   Title="SharePoint EventHandler Feature"
   Description="This feature will blah blah blah [..]."
   Scope="Web"
   Hidden="FALSE"
   AlwaysForceInstall="TRUE"
   ImageUrl="components.gif"
   xmlns="http://schemas.microsoft.com/sharepoint/">
   <ElementManifests>
      <ElementManifest Location="elements.xml" />
   </ElementManifests>
</Feature>
* I used an image (ImageUrl) that already existed for the icon that displays in the feature list in SharePoint. If you want to use your own, simply include the image in the IMAGES foler and point to it.
Now, open the elements.xml file and replace any code with the following
elements.xml
<Elements xmlns="http://schemas.microsoft.com/sharepoint/">
  <Receivers ListTemplateId="101">
    <Receiver>
      <Name>SharePointEventHandler</Name>
      <Type>ItemAdded</Type>
      <SequenceNumber>1000</SequenceNumber>
      <Assembly>
        SharePointEventHandler,
        Version=1.0.0.0,
        Culture=Neutral,
        PublicKeyToken=c5138f819b90316d
      </Assembly>
      <Class>SharePointEventHandler.ItemEventReceiver</Class>
      <Data />
    </Receiver>
  </Receivers>
</Elements>
* Note that the details for the Assembly tag came from the properties window that I asked you to write down or remember in the previous step! Also, theClass name refers to the namespace.classname name used in your class.
** Note that we specify the ListTemplateId to be 101 for a Document Library. You can specify another value, therefore pointing to other lists such as an Announcements list, Tasks list, etc. Here is a way to see all the other Id’s.
5. Installing the SharePoint Feature
We will now need to move the folders and their files over to the “12” Hive and register the feature with SharePoint. Again we will make us of VS2005 Post-build utility.
In your Solutions Explorer, double-click on Project and click on the Build Events SideTab. In your event text box, you should have one single line of code, which we wrote in our previous steps.
below that line, add the following code:
Post-build command
cd "$(ProjectDir)"

xcopy "12" "%CommonProgramFiles%\Microsoft Shared\web server extensions\12\" /ys
cd "%CommonProgramFiles%\Microsoft Shared\web server extensions\12\BIN"

stsadm -o installfeature -name SharePointEventHandler -force
iisreset
Your code should look like this:

Basically what we are doing is compiling our code with a strong name, installing it into the GAC, then we copy the folderstructure into the 12 Hive, then we install our feature and finally reset IIS.
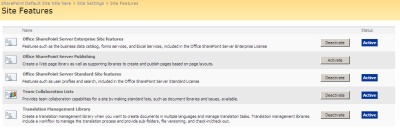
Before you build, ensure that SharePoint is working and navigate to the Site Features page. (Home> Site Settings > Site Features)
Now, in Visual Studio 2005, build your solution (this may take a few seconds…). Ensure you have the Output (View > Output) window open when you compile so you can monitor step-by-step what is happening in the background and if you have any errors.
Once the build is successful, refresh yoru browser window and it should look like this:
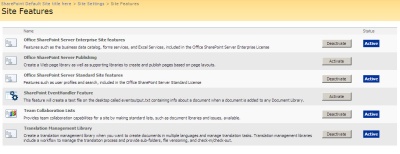
Click on Activate to activate your feature and you are ready to go!
6. Testing our feature
Ok, let’s test our feature… Open up a browser and go to your home page in SharePoint.
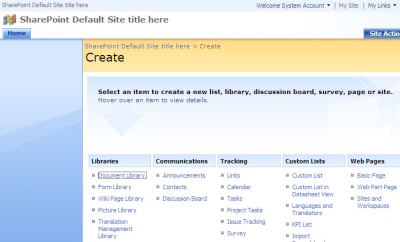
create a new Document Library by clicking on Documents (left hand side) and then selectCreate.
Now, select Document Library.
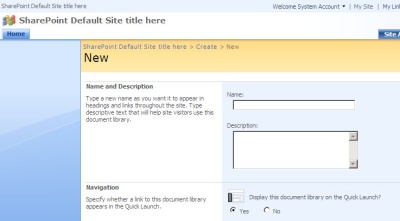
Type in a name, for instance, Feature Site Test and select Word Document as the document type (or any other type…).
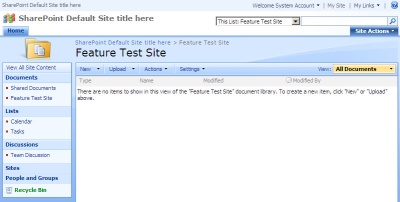
And there is your Document Library.
Now, click on New and because we selected the Document type to be Word, it will launch Microsoft Word. Type in anything in this document and close. It will prompt you to save it.
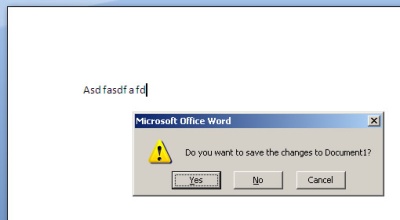
Select Yes and give it any name and Save.
This will add the document to the Document Library and it this event is trapped by SharePoint that now redirects it to our custom code, which creates a text file for us on the desktop (shown below on the desktop).
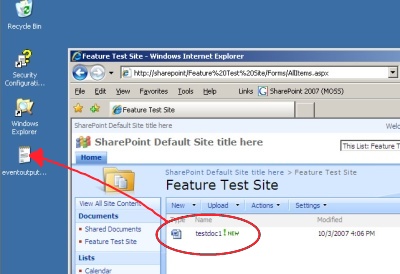
When we open the text file, we will see it contains specific data about the document that fired this event.

That’s it!
Enjoy!